Buying Photovoltaic Systems is not simply a matter of comparing panel prices. It is a long-term decision involving energy use, roof conditions, local weather, installation quality, and future maintenance. A low quotation may look attractive, yet it can hide weaker warranties, limited monitoring, or underestimated electrical work.
Dr. Fatih Birol, Executive Director of the International Energy Agency, described solar power clearly: “Solar is the new king of electricity markets.” His observation explains the growing interest in Photovoltaic Systems, but enthusiasm should not replace careful evaluation. This guide presents ten practical tips for checking system size, panel efficiency, inverter quality, battery value, installer credentials, warranties, permits, financing, and expected output. A useful proposal should show estimated annual production, not only a glossy image of panels on a roof.
Look closely at the details. Is one chimney shading the array at 3 p.m.? Does the installer explain degradation after twenty-five years? Can the monitoring app identify a failed inverter before the next utility bill arrives? These small questions matter. They also expose weak sales claims.
No buying guide removes every uncertainty. Solar estimates can be imperfect, especially where weather data is limited. Even experienced buyers may overlook future roof repairs or changing electricity tariffs. That is why independent advice, documented assumptions, and several written quotations remain valuable. The best system is not always the largest or cheapest. It is the one that fits the property, budget, energy habits, and realistic maintenance expectations.
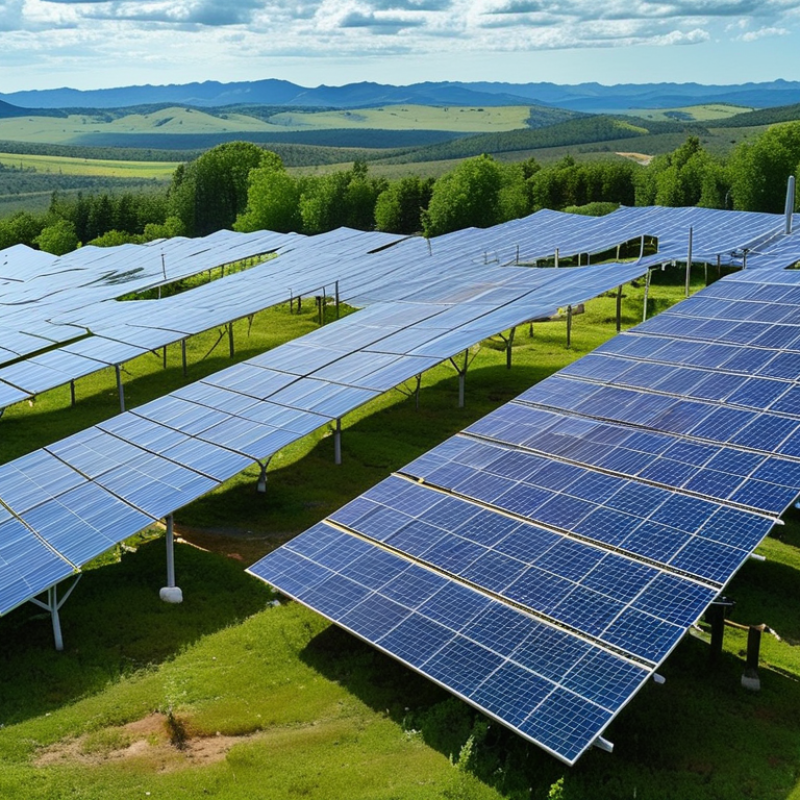
Before buying a photovoltaic system, assess how much sunlight your property actually receives. Roof direction, pitch, trees, chimneys, and nearby buildings all affect production. Shade changes everything. A roof can look sunny at noon but lose valuable morning or afternoon light. Walk the site during different seasons, if possible.
The International Renewable Energy Agency reported 1,419 gigawatts of global solar capacity by the end of 2023. This growth shows the technology’s maturity, not guaranteed savings for every home. Use a long-term solar dataset, such as the National Renewable Energy Laboratory’s solar resource tools, to estimate local irradiance. Then compare that estimate with your electricity bills. A 5-kilowatt system may perform very differently in two nearby towns.
Measure, do not guess. Check monthly consumption, roof age, electrical-panel capacity, and future loads such as electric heating. Request a shade analysis and a production estimate showing monthly output, not only an annual total. The NREL PVWatts documentation also cautions that model results are estimates, not engineering guarantees. That distinction matters. Weather, dust, snow, and equipment losses reduce real production. Even careful estimates can be wrong. Review the assumptions line by line, and ask an independent qualified professional to inspect structural and electrical conditions before signing a purchase agreement.
| No. | Assessment Dimension | What to Check | Indicative Data or Benchmark | Practical Method | Buying Implication |
|---|---|---|---|---|---|
| 1 | Annual Solar Resource | Estimate the solar irradiation available at the property throughout the year. | A photovoltaic system typically produces more energy in locations with higher annual peak sun hours. A broad planning range is about 900–1,700 kWh per installed kW per year, depending on climate, orientation, shading, and system losses. | Use a location-based solar resource database or a professional site assessment. | Compare quoted annual energy production with an independent solar-resource estimate. |
| 2 | Roof or Ground Orientation | Identify the azimuth and usable orientation of the roof or ground-mount area. | In the Northern Hemisphere, south-facing surfaces generally provide strong annual production; east- and west-facing surfaces can also be practical, usually with different daily generation profiles. | Use a compass, satellite imagery, or a measured site plan while accounting for magnetic deviation where relevant. | Choose equipment and layout based on the actual orientation rather than assuming one ideal direction. |
| 3 | Tilt Angle | Check whether the roof pitch or mounting structure provides a suitable panel angle. | For fixed systems, an angle near the site latitude is often a useful starting point for annual-energy optimization, although local weather, roof design, and seasonal priorities may change the result. | Measure the roof pitch and model annual output at several tilt angles. | Avoid paying for complex tilt structures unless the modeled energy gain justifies the additional cost and maintenance. |
| 4 | Shading Exposure | Assess shade from trees, buildings, chimneys, parapets, utility structures, and future development. | Even partial shade can reduce output disproportionately when modules are connected in series. Seasonal shading should be included because the sun’s path changes during the year. | Perform a horizon survey or use time-based shade modeling for morning, midday, and afternoon conditions. | Request a shade-loss percentage in the proposal and consider separate electrical tracking for differently shaded roof sections. |
| 5 | Usable Installation Area | Measure the area available after excluding setbacks, roof edges, vents, skylights, access paths, and maintenance clearances. | A modern panel commonly has an output of approximately 350–500 W and an area of roughly 1.7–2.3 m², but dimensions vary by product and design. | Create a scaled roof plan and reserve space for required fire, electrical, and maintenance access. | Size the system from the net usable area, not the total roof footprint. |
| 6 | Roof Age and Structural Capacity | Review roof condition, remaining service life, framing, waterproofing, and local wind or snow loads. | Photovoltaic modules and mounting hardware add a permanent dead load, often around 10–25 kg/m² depending on the system. The exact capacity must be confirmed by a qualified professional. | Obtain construction records where available and arrange a structural inspection before installation. | Complete roof repairs or replacement before installation if the roof is near the end of its useful life. |
| 7 | Electricity Consumption Profile | Analyze annual consumption, monthly demand, daytime usage, seasonal changes, and future loads. | The most economical system size depends on both total annual consumption and when electricity is used. Electric heating, cooling, water heating, and vehicle charging can materially change demand. | Collect at least 12 months of utility bills and use interval data when available. | Match system size to the expected self-consumption, export rules, and electricity tariff. |
| 8 | Temperature and Ventilation | Consider local temperatures, roof ventilation, and the installation gap beneath the modules. | Crystalline-silicon modules generally lose power as cell temperature rises above their rated test condition. Typical power temperature coefficients are approximately −0.3% to −0.5% per °C, depending on the module design. | Review the module temperature coefficient and proposed mounting ventilation in the technical specification. | Favor a layout that allows airflow and include temperature losses in the annual production model. |
| 9 | Grid Connection and Export Rules | Verify utility interconnection requirements, export limits, metering, and approval procedures. | Permitted system size, export compensation, application fees, and technical requirements vary by location and utility service. | Contact the electricity distributor before signing a contract and obtain written interconnection requirements. | Do not base financial projections on exported electricity until the applicable tariff and approval are confirmed. |
| 10 | Energy Yield and Loss Assumptions | Check how the proposal accounts for inverter conversion, wiring, mismatch, soiling, degradation, downtime, and shading. | A complete production model should show each major loss factor. Module nameplate power is measured under standardized test conditions and is not the same as real-world annual output. | Request monthly production estimates, loss assumptions, degradation assumptions, and the calculation basis used by the installer. | Compare proposals using annual kWh, estimated self-consumption, and cost per expected kWh rather than system capacity alone. |
: Check roof direction, pitch, trees, chimneys, and nearby buildings. Shade matters greatly. Observe the roof during morning, noon, and afternoon across different seasons.
A roof may look bright at noon but lose morning or afternoon sunlight. Winter shadows can also reduce annual production. I once ignored seasonal shading and overestimated output.
Gather twelve months of electricity bills, roof age, panel capacity, and future energy needs. Include possible electric heating or vehicle charging. Measure carefully.
No. The rating usually reflects controlled laboratory conditions. Heat, dust, snow, orientation, wiring losses, and shade reduce real-world output.
Grid-connected systems usually cost less and suit reliable utility service. They commonly stop during outages without approved backup equipment. Off-grid systems need batteries and detailed energy planning. Hybrid systems offer stored power but add cost and maintenance.
High-efficiency panels suit smaller roofs because they produce more power per square metre. Lower-cost panels may require more space. Lightweight thin-film panels can suit unusual surfaces, but efficiency may be lower.
Start with electricity consumption, not panel count. Include permits, roof repairs, scaffolding, wiring, insurance, maintenance, and financing. A spreadsheet may look attractive while missing winter production.
Compare net installation cost with realistic first-year savings. Test low-production conditions, rising electricity prices, equipment replacement, degradation, and loan interest. Use at least three scenarios. Perfect savings are unlikely.
Buying Photovoltaic Systems requires careful planning to ensure the system matches your property, energy needs, and budget. Start by assessing your roof or available land, including sunlight exposure, shading, orientation, structural condition, and local climate. Then compare system types, power ratings, storage options, and expected energy output to identify a solution that can meet your household or business requirements. High-quality equipment should include recognized safety certifications, clear performance specifications, and warranty terms that cover both products and expected output.
Before making a decision, calculate the complete installation cost, potential energy savings, available incentives, and estimated return on investment. It is also important to choose a qualified installer with appropriate experience, insurance, and transparent pricing. Ask for a detailed proposal covering design, permits, installation timelines, testing, and after-sales support. Finally, create a maintenance plan that includes regular inspections, cleaning when necessary, performance monitoring, and timely repairs to help the system operate safely and efficiently for many years.

 Linde Cable